Related Products: Signature Manager Exchange Edition | Signature Manager Outlook Edition | Template Editor
WARNING! From 1st April 2021 Exclaimer will no longer be renewing any Software Maintenance Agreement (SMA) for Mail Disclaimers.
Please be assured that the Exclaimer Support team will provide support until your SMA is active.
However, we recommend that you contact the Exclaimer Sales team to discuss your requirements for an upgrade to Signature Management Exchange Edition or Exclaimer Cloud - Signatures for Exchange.
Scenario
The signature design requires a specific layout, however, you are unsure of how this can be achieved. You know it needs rows and columns, as well as spacing between the elements in the design.
Resolution
Tables are a great way to build and control the signature design, using rows, columns and padding to add space and, give the signature template a professional feel.
The tables can be found at the top of the template editor window, under the table icon.

There are three different tables that you can use to create your signature template, they each have their pros and cons and ease of use.
Contact Block - A smart table containing contact numbers and email addresses, with labels and several layout options.
Smart Table - A smart table is optimised for common layout tasks, such as creating contact blocks, business cards and other groups of information. Smart tables are used with Active Directory fields with options to suppress the table row if the field is empty.
HTML Table - Used to create simple to more complex layouts, allowing total control of how the signature appears. It's also one of the easiest options to work with when building Email Signature Templates.
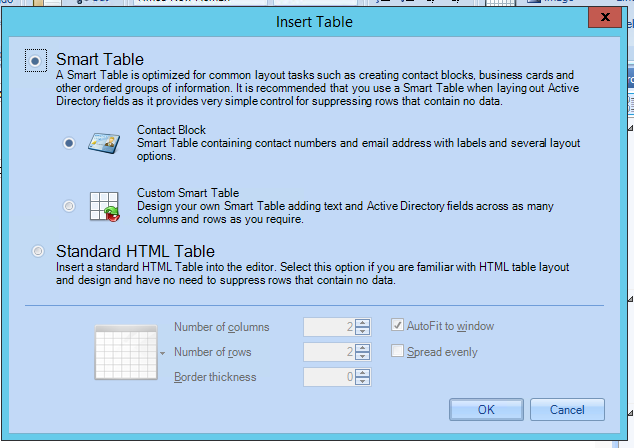
Standard HTML Tables
Standard HTML Tables are typically used to build and construct signature templates. The Exclaimer Template Design Team recommends using HTML tables where possible. This allows for a range of different layouts from the most simple, to the more complex designs by using Table Properties and the Field Properties to make the signature come alive.
To create an HTML table:
- In the Insert Table window, select Standard HTML Table.
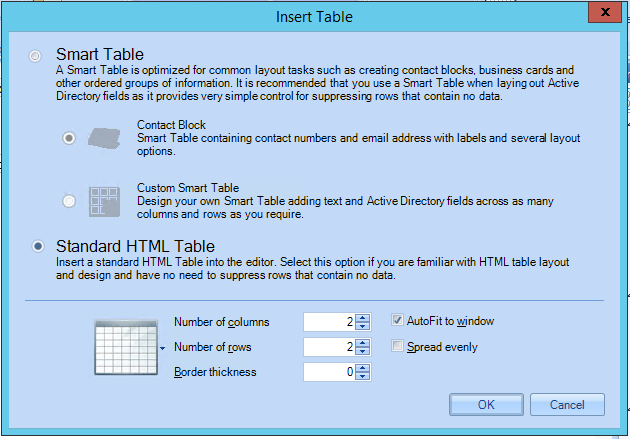
- Select how many rows and columns you would like for your HTML Table then click OK.
You can either click on the table grid option to select the rows and columns, or you can manually type and or use the arrows on the right-hand side which will generate the table for you.
Example: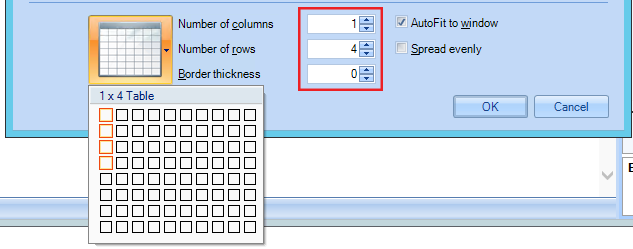
The table is automatically generated in the design view and ready to use.
Example: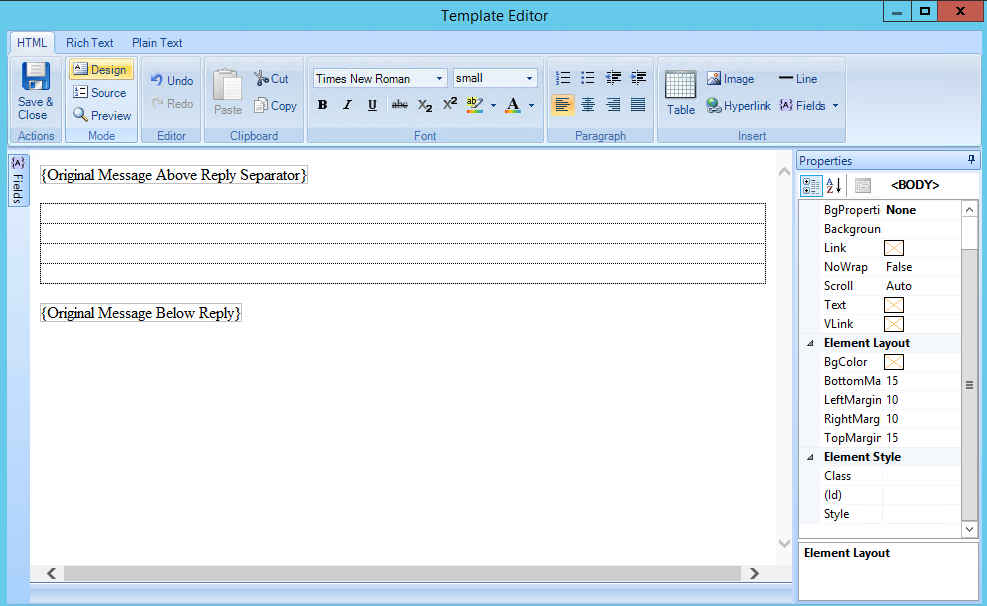
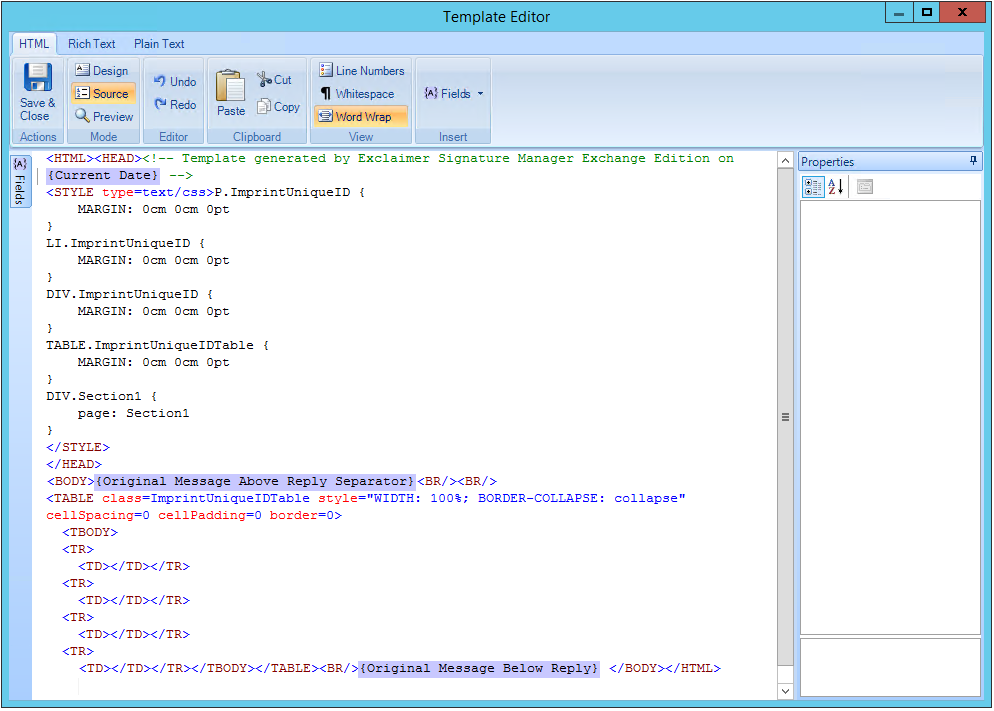
The source code is also automatically generated for you.
- You can edit the source code any time, to modify the width, padding and add other styles if needed.
- Click on any cell to add other tables, fields, images and text. Just follow the steps above to add another table to the cell you are in - the new table will be displayed inside the cell.

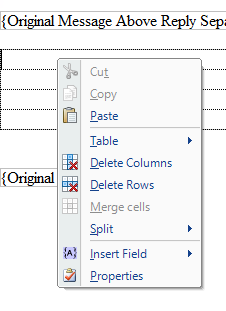
- If you right-click on the table cell, a mini menu will be displayed. Use this menu to insert fields and images, delete columns, delete rows and split the rows.
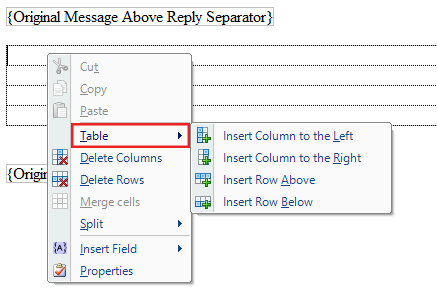
- Under the Table sub menu, you can add rows and columns to the left and right and, above and below the cell you are in.
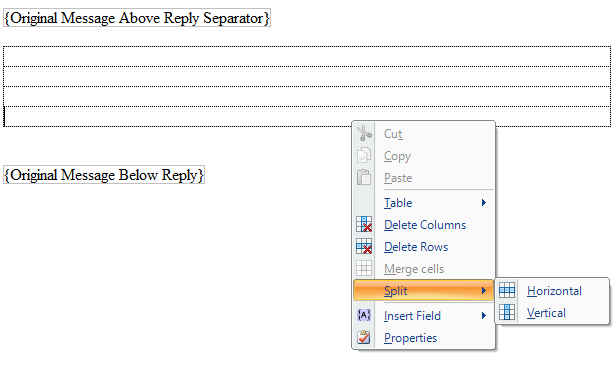
- Under the Split sub menu, you can split the table cell vertically and or horizontally.
- You can merge cells by highlighting two of the cells, right-click then select Merge cells.
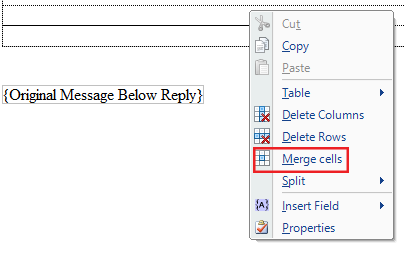
- Once you are happy with the general structure of the table, you can add in your fields, images, text and other elements to bring your signature design to life.
Font Styles and Field Properties
To add a field:
- From the Fields menu, select a field.

Message Sender contains all the fields from the Active Directory.
When working with fields, such as the {Display Name}, {Telephone Number}, {Email Address}, {Custom Hyperlink} and so on, use the Field Properties on the right-hand side of the template editor to set the fonts and colours, based on the design required.
For further information on how to use fields and style them, please follow Font Styling in On Premise Solutions.
- Appearance: This allows you to select or type a font name, as well as set the size in pts.
Setting colours is always in a hex value, but you can type in colour names, such as 'aqua', 'Red', 'green' and so on.
Bold, underline and small caps are also possible. However, if you need a specific field case, you can change it here also.
- Behaviour: This allows you to show and hide a field if it is blank in the Active Directory - this also affects the Prefix and Suffix as well.
- Content: This allows you to add a prefix and suffix, as well as suppressing lines and adding a fallback value, although suppressing lines and fallback values are not commonly used.
You can also use the Source Code and the Style Editor to add further styles to your fields.
Table Properties
To view the Table properties, simply click on the table itself.
Each Table Cell has its own set of properties that can also be styled based on the design of your signature.
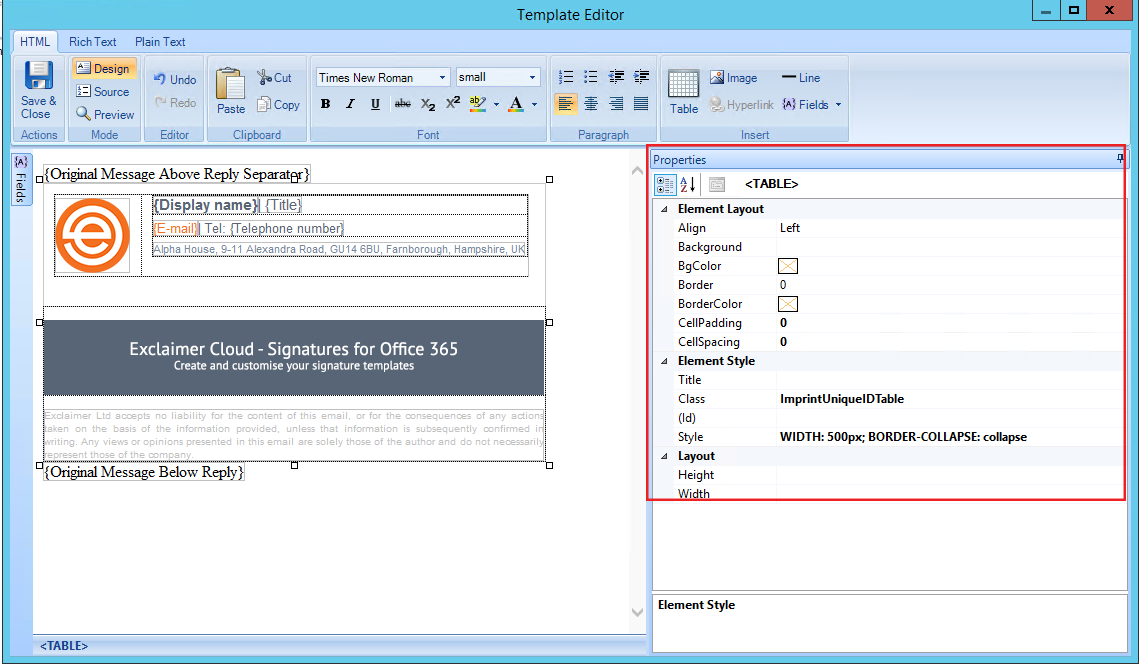
- Element Layout: A group of categories to align and style the table.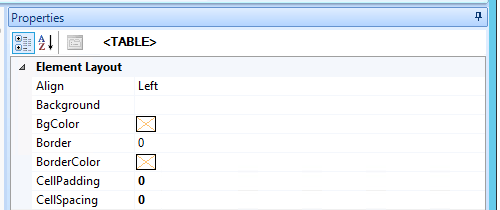
Align: Aligns the table to the message body and or display window.
Background: Sets a background image and or style to the table.
Border: Sets a border thickness to the table.
BorderColor: Sets color to the borderline.
CellPadding: Adds padding to the table cell.
CellSpacing: Spaces the table cells according to the value set.
- Element Style: A set of categories to style the table further.
Title: Adds a title to the table source.
Class: Sets a class on the table from a CSS style code.
(id): Sets an ID on the table.
Style: An editor that controls the table, add inline CSS styles into this section.
- Layout: Further controls the table.
Height: Adds height to the table.
Width: Adds width to the table.
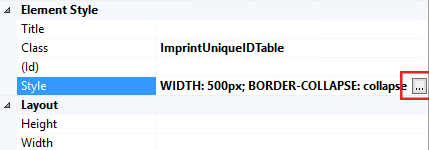
keep Border-Collapse: Collapse; in the style box, to allow the table to work correctly as the adjacent table cells share borders, which means that they will not be separated from the design.
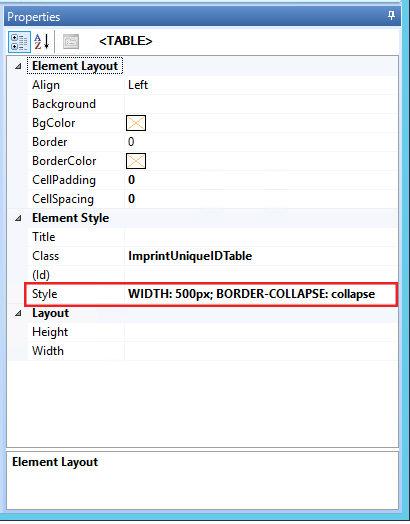
If the style box has a lot of styles inside, sometimes it is best to use the Table Style Editor, to get to this window. Click inside the style box and then click on the [...] grey button that appears.
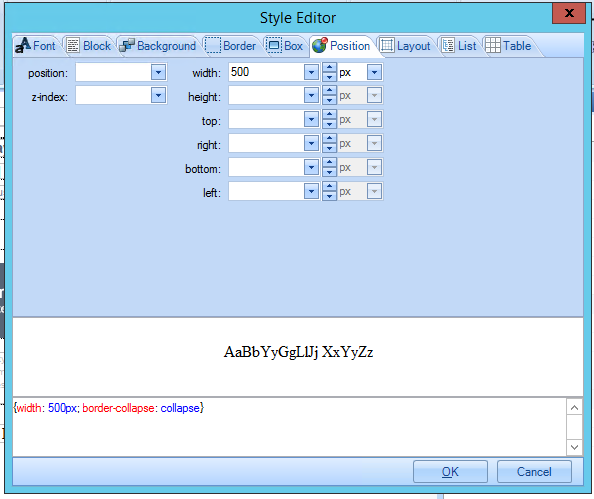
The Style Editor has everything you need to style the table and table cells. It will automatically go to the tab for the code used, as an example, this is in the Position tab to show the width of the table.
The style editor can also be used when styling fields and fonts.
Cell Properties
Each Table Cell has its own set of properties that allow for further customisation of the signature.
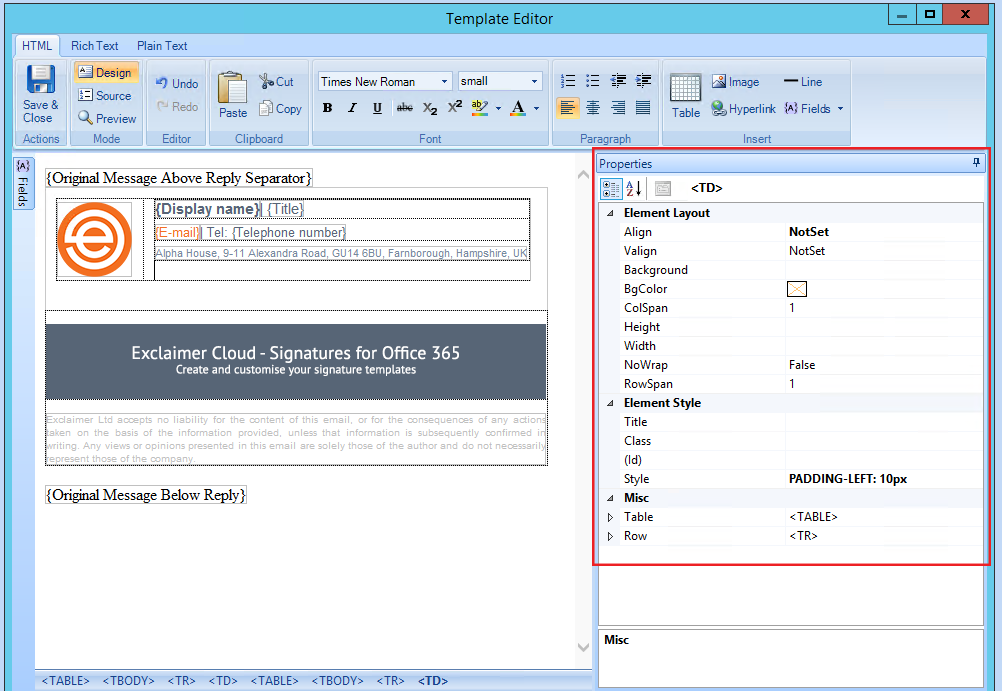
- Element Layout: A group of categories to align and style the table cell.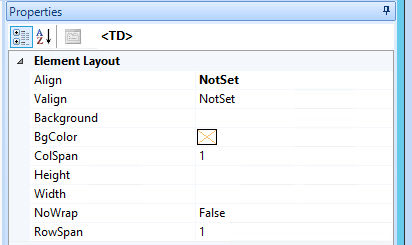
Align: Aligns the content to the cell and adjacent cells horizontally.
Valign: Aligns the content to the cell and adjacent cells/content.
Background: Sets a background image and or style to the cell.
BgColor: Sets a background color to the table cell.
ColSpan: Sets the number of columns the table row should span.
Height: Adds height to the table cell.
Width: Adds width to the table cell.
NoWrap: Tells the table cell to wrap the content or not.
RowSpan: Sets the number of rows the column to span.
- Element Style: A set of categories to style the Cell further.

Title: Adds a title to the table cell.
Class: Sets a class on the cell from a CSS style code.
(id): Sets an ID on the cell.
Style: An editor that controls the cell, add inline CSS styles into this section.
- Misc: A set of categories to style the Cell further.
Table: Displays the style set on the table itself.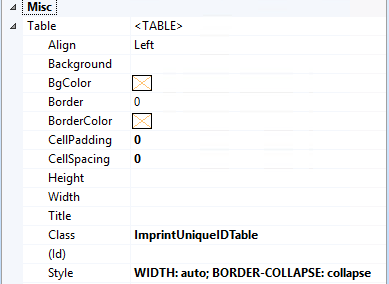
Row: Displays what can be set on the table row, and also has its own Table Category that shows the table settings.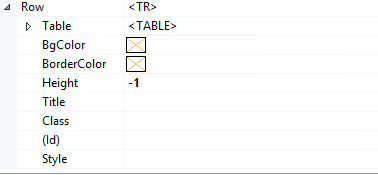
Using the Source Code
In the Source Code, you can see the HTML code generated, as you work. You can edit the source code to apply font stacks, colours, padding and so on.
Instead, build the signature using Standard HTML Tables and use padding where possible, to space out the elements of the design.
See the example below:
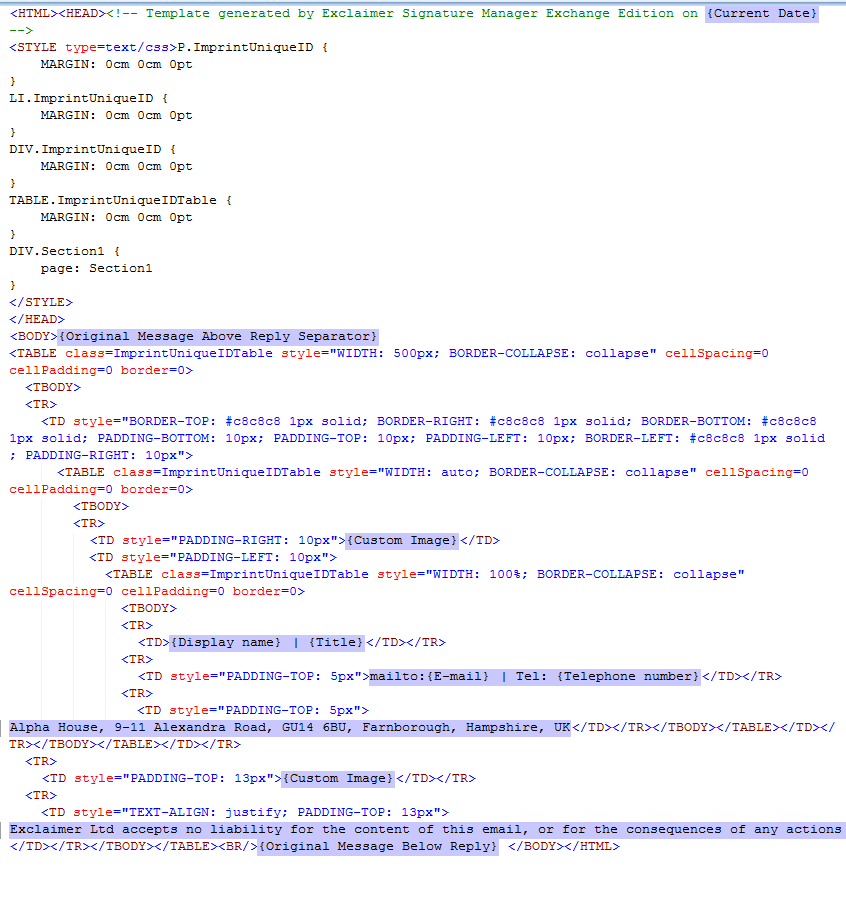
The purple highlighted text displays the fields and elements used. Surrounding these elements are the code to structure the table and signature.
The top section of the code is required for the signature to work - this is pre-built styling and structure that must not be modified or removed from the signature.
Removing or editing this section may cause issues with the signature template itself.
<STYLE type=text/css>P.ImprintUniqueID {
MARGIN: 0cm 0cm 0pt
}
LI.ImprintUniqueID {
MARGIN: 0cm 0cm 0pt
}
DIV.ImprintUniqueID {
MARGIN: 0cm 0cm 0pt
}
TABLE.ImprintUniqueIDTable {
MARGIN: 0cm 0cm 0pt
}
DIV.Section1 {
page: Section1
}
</STYLE>
</HEAD>
<BODY>{Original Message Above Reply Separator}
Table, TR and TD tags are all for the tables and table cells used in the signature, each level can have its own style which will then reflect in the design.
TABLE - The Table itself
TBODY - Table Body
TR - Table element defines a row of cells in a table
TD - Table Element that contains data or elements of the signature
<TBODY>
<TR>
<TD style="BORDER-TOP: #c8c8c8 1px solid; BORDER-RIGHT: #c8c8c8 1px solid; BORDER-BOTTOM: #c8c8c8 1px solid; PADDING-BOTTOM: 10px; PADDING-TOP: 10px; PADDING-LEFT: 10px; BORDER-LEFT: #c8c8c8 1px solid; PADDING-RIGHT: 10px">
<TABLE class=ImprintUniqueIDTable style="WIDTH: auto; BORDER-COLLAPSE: collapse" cellSpacing=0 cellPadding=0 border=0>
<TBODY>
<TR>
<TD style="PADDING-RIGHT: 10px">{Custom Image}</TD>
<TD style="PADDING-LEFT: 10px">
<TABLE class=ImprintUniqueIDTable style="WIDTH: 100%; BORDER-COLLAPSE: collapse" cellSpacing=0 cellPadding=0 border=0>
<TBODY>
<TR>
<TD>{Display name}{Title}</TD></TR>
<TR>
<TD style="PADDING-TOP: 5px">{E-mail (as hyperlink)}{Telephone number}</TD></TR>
<TR>
<TD style="PADDING-TOP: 5px">Alpha House, 9-11 Alexandra Road, GU14 6BU, Farnborough, Hampshire, UK</TD></TR></TBODY></TABLE></TD></TR></TBODY></TABLE></TD></TR>
<TR>
<TD style="PADDING-TOP: 13px">{Custom Image}</TD></TR>
<TR>
<TD style="TEXT-ALIGN: justify; PADDING-TOP: 13px">Exclaimer Ltd accepts no liability for the content of this email, or for the consequences of any actions taken on the basis of the information provided, unless that information is subsequently confirmed in writing. Any views or opinions presented in this email are solely those of the author and do not necessarily represent those of the company.</TD></TR></TBODY></TABLE>
Every time the style box in the design view is used, the code will generate a style tag, followed by an equals sign, quotation marks and then the code set for the style.
In this set of code, there is a border and padding set on all sides of the TD:
Lastly, are the closing tags for the Body and HTML tags, seen at the top of the code structure: