Relevant Products: Signature Manager Exchange Edition | Signature Manager Outlook Edition
Scenario
The signature template is using the custom smart table feature to display the contact information required. However, you are experiencing issues with how the information is displayed on a received email, or you are having issues editing the table.
As custom smart tables are typically a 'Tabular' setup, we can replicate this, in the same way, using a standard HTML table, conditional fields and the fields from Active Directory.
Resolution
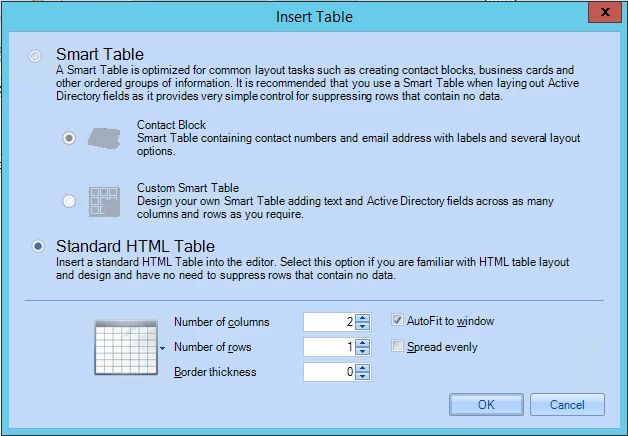
- Insert an HTML table of 2 columns by 1 row, this will keep the fields in line with each other.

- In the right-hand column, insert the contact fields required from the field menu.

In this example, we are using Telephone, Mobile, Fax and Email, as these are the standard contact fields used in the majority of signature templates.
Example:
Note: These should be entered on one line. Do not put return lines in. We will add these later on, using the Suffix of the field itself. - In the left-hand column, insert three conditional fields from the Advanced menu (Fields > Advanced > Conditional Field).

- The conditions should check if the field is present, with a single return line included.
Each condition should match the fields in the right-hand column.
Note: Insert the return line by editing the value of the condition by clicking on the [...] - the Expandable field Editor is displayed.
Type in the prefix required, then press [Enter] after the prefix.
(Do not try to add \n as this will be ignored. The editor displays \n as it's a RTF format)

- For the Email: prefix, we have used a Composite Field (Fields > Dynamic Content > Composite Field).

The reason for this is we know that the E-mail will always be in the signature at all times, therefore a condition is not needed. Of course, this depends on how the signature is required to work.
A single return line should not be used here.
- On each of the fields in the right-hand column, add a single return line in the Suffix, apart from the field at the end; in this case the E-mail field.
This will allow the fields to line up to the relevant condition.
To find the Suffix,
- Click on the field and use the field properties on the right-hand side of the Template Editor.
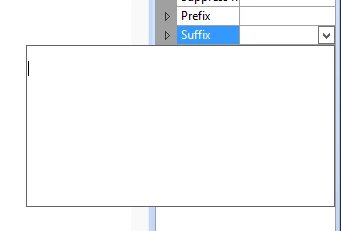
- Click inside the Suffix box to enable the drop-down arrow and press [Enter] to create the Single Return Line.
- Once you have set the Return lines in the suffix, set the fields to Hide if Blank: True by double-clicking in the options box, or use the drop-down arrow to select the correct option.
The E-mail field is optional. In this example, we have left this option empty.
- Next, either add in a fixed width in the left-hand column or use padding in the Style box of the table cell. This will allow the prefixes to align accordingly and keep a space between the table cells.
To edit the table cell,
- Click the cursor next to the E-mail composite field with the template editor window expanded fully. This will make it easier to edit the table cell.
- The final result should be similar to the below example. Once you are happy, you can style the fields using the Field Properties on the right-hand side, or use the Source code with Span Tags.

We recommend: You test your signature once this is complete.
If either the Telephone, Mobile or Fax number are empty in the Active Directory you will find that the lines are suppressed, similar to the Smart Table functionality of 'Suppress line if field is blank'. Reducing any extra gaps that may appear without using this method.
If either the Telephone, Mobile or Fax number are empty in the Active Directory you will find that the lines are suppressed, similar to the Smart Table functionality of 'Suppress line if field is blank'. Reducing any extra gaps that may appear without using this method.